Quantcast
Channel: Surly Bikes Blog
Viewing all 750 articles
Browse latest View live

Rainy Sunday: The Quick Rim Swap.

$
0
0

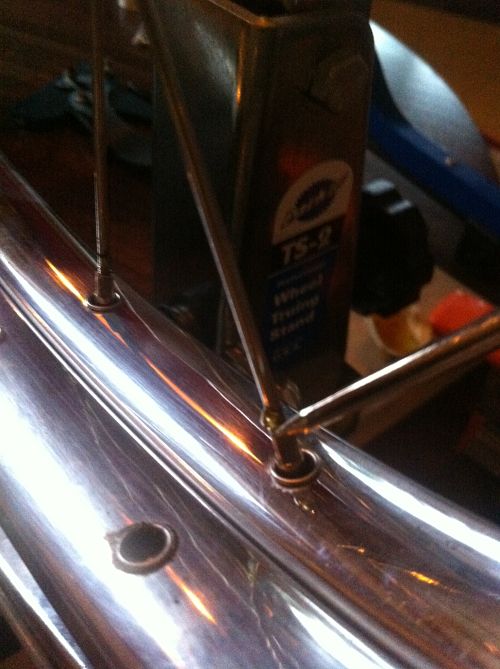
Inspired by the particularly shitty weather on a recent Sunday afternoon I got to one of the many bike maintenance projects I had piling up. Last “season” I had put a few hundred miles on a newly minted pair of shiny but decidedly practical wheels (Ultegra hubs laced to H+Son TB14 rims via DT Swiss competition spokes and brass nipples) when the rear wheel suddenly refused to stay in the nice round shape that we prefer rims to embody. It turns out the seam had “failed”. By failed I mean an insurmountable flat spot developed and could not be remedied with spoke wrenches, magic spells or verbal threats. I contacted H+Son’s state side (QBP) representative and was promptly issued a warranty replacement. To be perfectly clear, I read this situation as a total anomaly and would and will certainly purchase their rims in the future without hesitation. It occurred to me while I was readying my supplies and preparing to tuck into some seriously blissed out wheel building chill time in my pillow strewn, opium den of a living room that I should perhaps use this as a teaching moment to you the peoples of the internet. I learned this trick from a local wheel building “guru” a number of years back while we were getting ready to burn some rubber in and around some of Minneapolis’ finest alleys on a summery Wednesday night. Long story short: Pregame derby shenanigans led to a tacoed wheel the likes of which was un-resurrectable. This master wheel smith, we will call him Reed for the sake of this story, takes a look at it and says he can have a new wheel built in less than 25 minutes. Thus I was introduced to the quick rim swap technique. Quite simple really but mind blowing if you hadn’t considered the time savings between this way to relace a wheel vs. tearing down a wheel and building it back up from scratch. (Note: I do apologize for the crappy photo quality presented here but you shouldn’t encumber motivation when it strikes; I used what I had on hand.)  

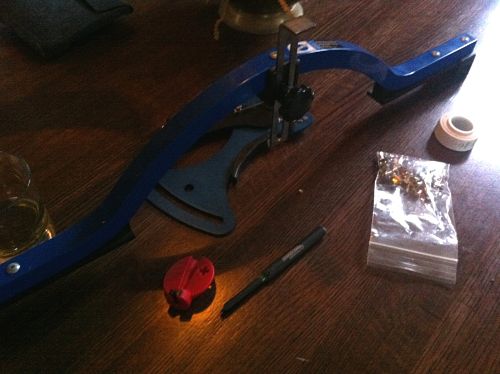
So I got some tools together:
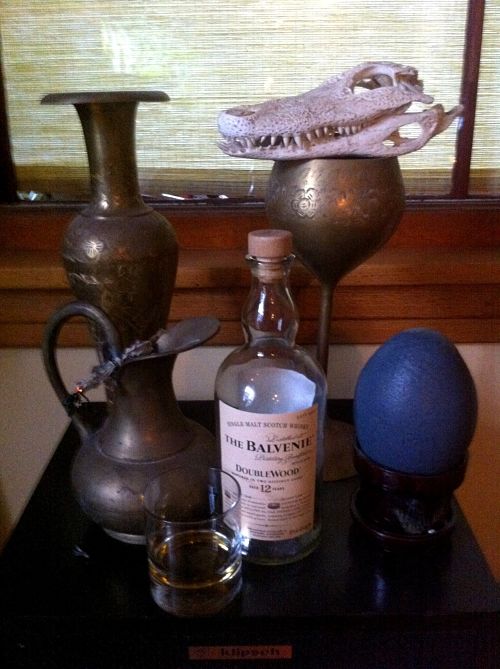
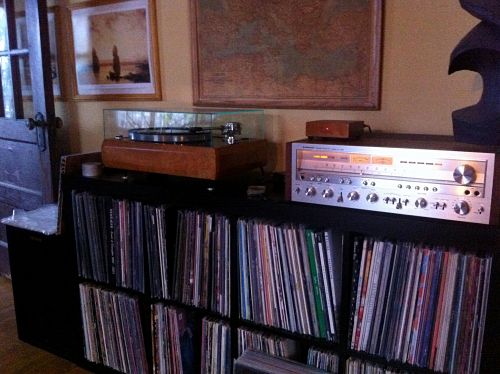
 Fired up the Hi-Fi:
And got to work:
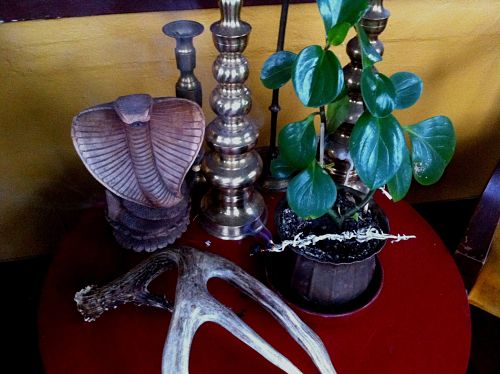
Before you start I might suggest some offerings to the spirits…and/or spirits (of choice).   
 

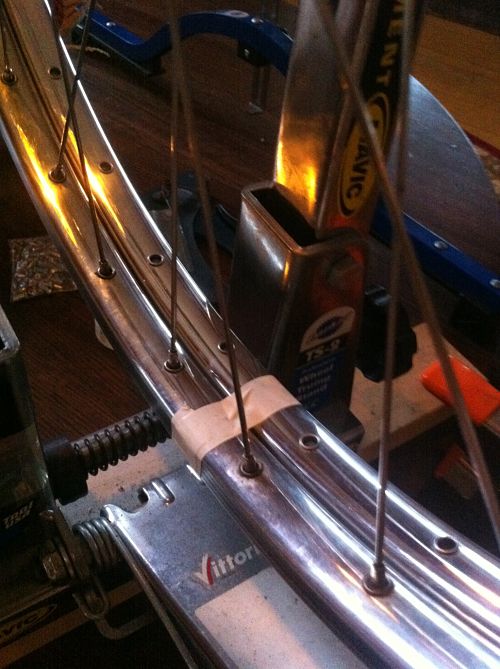
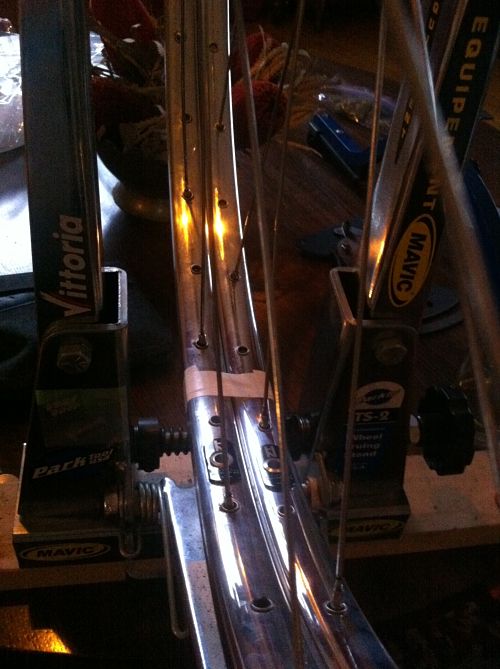
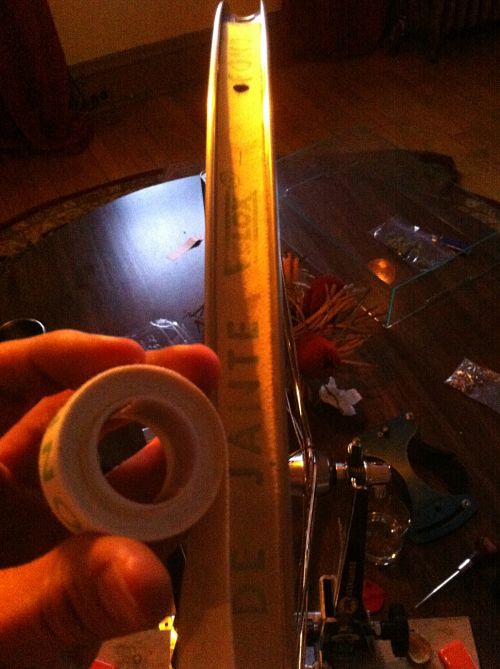
Step one: Tape new rim to dead rim with electrical tape (easy to remove and doesn’t leave a nasty residue). Line up the valve holes and make sure your offset (if applicable) matches. If you relace to the new rim “backwards” your spokes will not be mated to their appropriate offset hole…and that’s no good.

Step two: Detension spokes using a standard spoke wrench. I take em down in two passes just to be safe. You don’t want to drop the nipples out one by one from full tension. Trust me.
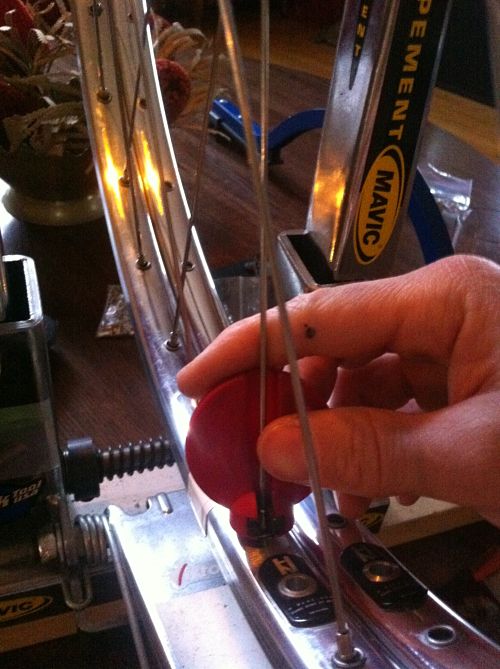
Step three: Using a nipple driver of some sort (I prefer the Problem Solvers “Holy Driver”) back out one nipple at a time and move spoke over to the new rim. I feel that doing one side of the wheel and then the other works best. Secure each spoke with the same nipple you just removed by threading it on half way. This is a great opportunity to replace bent spokes, stripped nips or swap those colored alloy nipples that you mistakenly thought were cool for some brass ones.
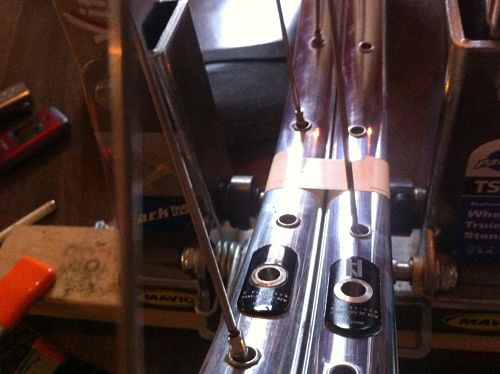
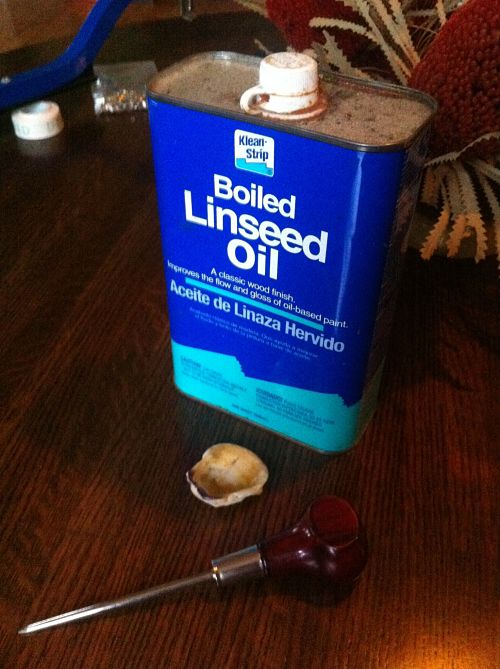
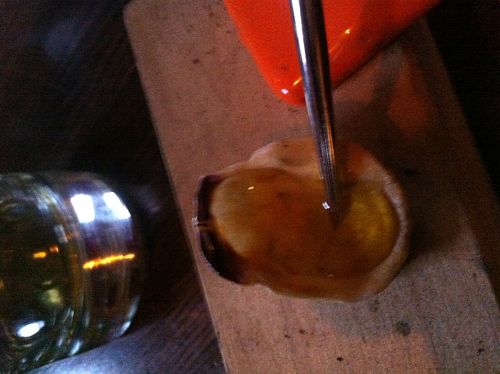
Step four: Add some thread lock if you are so inclined. I prefer linseed oil as it lubricates while you are tensioning and later locks your nips in place after it has cured. I do this by pouring out a small amount in a small sea shell and dipping a sharp object in the oil; collecting a small bead for each spoke. Touch the tip to the threads above the nipple and watch as the oil drains into the threads.
Step five: Using my Holy Driver, I tighten all the nipples onto the spokes until the driver backs off. This gives me an even starting point to begin tensioning the wheel. I saw Reed do this step and step three with a power drill and a nipple driver bit. It took him less than 2 minutes to make one pass on the wheel.
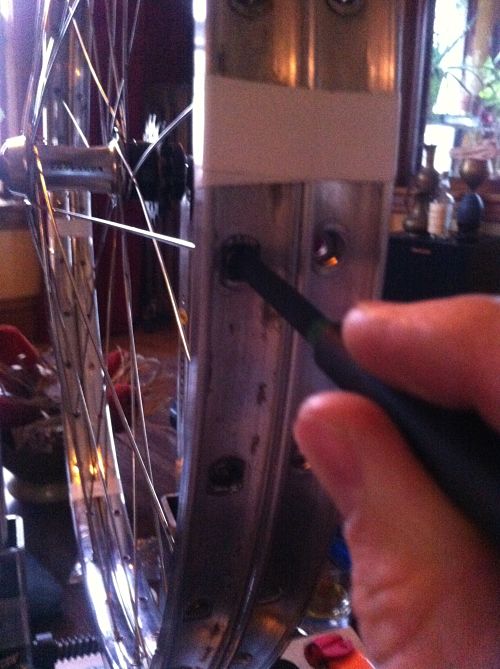
You can now remove the dead rim if you haven’t already and set it aside for recycling or some hippy dippy art project. Also bums and scrapers will collect your old rims if you put them in a pile in your alley.

Step Six: Bring up to proper tension while occasionally relieving stress on the spokes (see “Seating and stress relieving the spokes”). Some might argue that the spokes are already seated and thus don’t require subsequent stress relieving but I say “meh, why not just do it?” Finish your wheel with a high quality rim strip and pour yourself a celebratory libation.
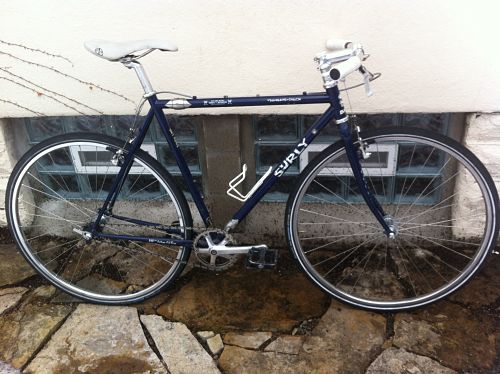
My trusty and dusty, but never musty, Traveler’s Check is back in business!
Did I mention that this was a SERIOUSLY MELLOW day? Grouper provided my soundtrack:


Report from Fruita by Bob and A3

$
0
0

Day one we got to denver and ate a bunch of chips and tacos with phillip and tyler.  Salvagetti looks awesome and they are busting their ass to move surly. Lots of karate monkeys, which was a surprise to me.

Day two we drove out to Fruita, found a room nestled between two jar shops at the H motel for the weekend, and drank beer at the hot tomato until our chairs were the only ones not upside down on the tables.

Day three (today) we rode out at kokopelli and 18 road all day and had a blast. Gave out lots of coors at each respective trailhead.

Lots of kessel run and joes ridge. I shredded an older sample 120 tpi tire, but the production one is holding up like a champ. I brought a spare 27 tpi tire but left it at Selvegetti. Fucker.

Rode with a group from niner that were fast and cool. Everyone that i talked to on the trail said they've almost cleared the horsethief chute, but i didn't see anyone try it and don't really believe them.

There is a vip dinner tonight, but i think were getting pizza instead.

It's 70 and sunny here and Bob is sunburned to hell.

Thats everything so far

XOXO

Andy and Bob

Cool Bike Art or Fiendish Gateway Vehicle??

$
0
0

So our Art Director (AWood) does all kinds of really cool art, as well as design our t-shirts, catalog, frame decals and other stuff for our brand.  Last year he involved himself in celebration of Bicycle Culture and Art called ArtCrank.  That’s where a bunch of bicycley artists make limited edition screen printed posters and sell them.  I though AWood’s was really cool and I mentioned to him that he should do that for Surly.  And he did.  Which leaves me wondering what to do with 100 limited edition Surly Posters.  Hand screen-printed here in Minneapolis, Minnesota, USA.

Here it is (there is a 120mm stem in the shot so you can see just how big that thing is)

That’s where you come in.  I’ve decided to give them to you, well at the very least 94 of you (I want to keep the last few to sell on eBay). 

A few years ago, before I worked for Surly I was just a simple bike geek.  I loved riding, drinking beer, and I was a huge fan of Surly.  I know that I would have loved to have something like this in my shop space, or (if I could talk my wife into it) hanging in the house. There were people I know who called me a Surly Super Fan or Super Nerd, or just big fat geek.  All of which was fine with me, I am a big fat nerd, and despite the fact that I live and work in the Surly hovel now, I still love things like this.  I’m just in a position where I can get it easy.  So I want these to go out to other people (nerds) in that same vein.  Do you really like Surly?  So much so, that one of these cool posters would find a prominent place on your wall or in your shop?

Send me an emial with "poster" in the subject line and a picture of you on your ride, or just your ride and a little something about why you like/love/hate/worship/demonize/whatever Surly (by May 15th to tyler@surlybikes.com).  I’ll send you a poster if you do, so make sure you give me your address.  If there are thousands of people who do this, then I’ll pick the 94 that I like the most and send those people posters.  If there are 94 or less, then you’ll be in posterland (popluation you) even if your picture is blurry and the reason you like Surly is “cuz.”

Get to it nerds!


SSEC 2013 Report

$
0
0

Last week I was lucky enough to attend Single Speed European Championships in Spain.  I went there with Greg.  For him it was his first time, and for me my third.  The first time I went was in 2007, held in Piolenti, France.  Then, after a five-year absence, Tyler and I attended last year when it was in Floressas, France. 

SSEC has now become an event not to be missed for me.  The single speed events I have been to have almost all been great, because they’ve tended to not take themselves too seriously.  Single speeding as a discipline is about fun rather than competition, and the single speed “races” I have been to have not often veered away from this rule.

This year, SSEC was held in the village of St. Gregori, near Girona in the autonomous community of Catalonia.  Flying into Barcelona, you can get there in about an hour and a half via automobile.  Greg and I were picked up by David, partner and owner of Espai Bici bike shop in Barcelona.  He and his partners also own a sister company that distributes Surly products throughout Spain, so we were lucky to be able to combine a business trip with the fun of attending SSEC.

I have traveled to Europe many times but never to Spain.  The first thing I noticed when we arrived was the bright, warm Barcelona sun shining down upon us.  This was much welcomed in contrast to the blizzard we had left behind us in Minneapolis.  We soon realized that we stood out as tourists in our short-sleeved t-shirts and shorts.  The locals were still wearing winter coats even though the temps were in the upper 60’s.  One thing was for sure, we had arrived to simply perfect riding weather, and it remained like this for our entire one-week stay. 

After arriving in St. Gregori, the other Gregory and I took brief naps to shake off some jet lag, and then rode our bikes down to the camping area to see what was shaking.  We found that many of our friends from France, Belgium, The Netherlands, The U.K., Northern Ireland and Spain were already there.  The Belgians brought with them a truckload of their finest beers, making them instant best friends of all of us.

We went to a party and a single speed race broke out.

There was no planned dinner on Thursday night so a bunch of us pitched in some cash to make a grocery run so that the local Catalans could prepare us their traditional Catalan style supper. Fresh baguettes rubbed with the pulp of fresh tomatoes and garlic, local sausage and cheese, olives and garbanzo beans, and cheese pot made by Toby from the NL.  

On Friday, David, Greg and I went for a ride on the sweet local trails.  After about an hour of climbing we finally made it to the top.  The descent was well worth the climbing.

On Saturday the race began at 10:00 a.m.  A group of about 300 of us rolled out behind the organizers car, about a mile down the road where we were told to leave our bikes and hike up the hill to the courtyard of a local church. 

You all know the drill.  A classic Lemans start requires shenanigans, and this year the organizers did not disappoint.  Usually I can find my bike pretty quickly at these races, but this time it took me about 10 minutes because someone placed it in a ditch about 50 yards down the road from the lot where I had left it.  No big deal though, I had no aspirations of doing any actual racing, and by the time I got on the bike and started riding I was soon stuck in the bottleneck of the entry to the singletrack.

Once we got rolling we were treated to some really sweet trails.  The terrain was varied between twisty single track through forested hills, to mountain fire roads, to stream crossings and finally roads crossing scenic farmland of St. Gregori.  There was plenty of climbing and some really steep descents.  The old saying, “Single Speeders Get Off More” was never more true than on this course.  There were many long, steep climbs that forced even the strongest riders to get off and push their bikes.  Each lap was about 5 miles, and the first rider to finish five laps was the winner.  I have no idea who won, and none of the people I asked knew either.  I call that a success.  The majority of folks who attended had the right attitude about what a single speed event should be, and this contributed to one of the best events I have ever attended.

When the race was done we were escorted back to the campground.  I took a nap and after I woke up I groggily made my way over to where a crowd had gathered for feats of strength.  The main event was a bike toss. 

When the bike toss was done, the competition between Northern Ireland, The Netherlands and Italy was held to determine who would be hosting SSEC 2014.  I could tell you the dirty details but I’d prefer to keep that a special little secret for those who were there in person to tell you at their discretion.  Go ahead and google the word swaffle to get an idea and picture in your mind a Moonlander with a permanently soiled to tube.    In the end it was decided that Northern Ireland was the victor.

Needless to say we had the times of our lives and cannot wait until next year.  Special and heartfelt thanks to Carolina and Marcal, who organized this great event, and to Narcis for building such incredible trails for us to ride. 

Many many others also deserve thanks.  We made a ton of new friends and created great memories and stories to share.  Thanks to all of you who played a part in this.  You know who you are. 

Here is a smattering of other pictures I took during the week.

A Tiny Bit of Wood

Pedal Pumpers

$
0
0

Over the weekend I saw a posting from an online bike dealer that caused some chamois to bunch up. They posted the image below with a tag line You don’t get legs like this pushing a gas pedal!


Commenters took them to town for posting a waifish pair of legs in strappy high heels leaning up against a toe cage clad fixie. I copied some of the comments below for context:

 “Or riding a bike”

“You get legs like those from not eating”

“I would look stupid with legs like that.”

“If you WANT a woman with legs like that you must never want to ride bikes with women. Real cyclists have real muscles. Not toy Barbie legs.”

“Your Art Director needs to go back to Cosmo.”

“Those are not cyclist legs, nor is she gonna ride that bike with toe cages and high heels. I'd actually like to see her on it, and see what happens when a slight grade appears. That would be funny.”

“Cigarettes and cocaine”

“I suppose she rode that fixie to the shoot in those heels too right? Give me a break. #chickenlegs”

Needless to say this was a pretty big swing and a miss on connecting with their intended audience.

I could go on about the tiny thighs, unforgiving-plastic-looking-painted on pants, strappy high heels and such but in all reality, does it really matter? Being someone who has ridden a dirt bike in a mini skirt and strappy sandals, I am not one to judge someone else’s choice in ride gear.

I did feel moved to gather my very own collection of rider legs since I am swimming in material on a daily basis.

Here are a few pics of my co-workers, friends, and random cyclists who happen to work close by. Some are thin, some are thick, some are short, some are tall, some are hairy, some are smooth, some tattooed, some with freckles, some scarred, some are oddly unblemished, but one thing I know for sure – all ride bike

Now untangle from the internet and go ride your bike. There is nothing to see here anyway.

Going Camping: Preface.

$
0
0

So I’ve been thinking…What would it be like to camp 2 or 3 days a week for the rest of the summer?  Except, of course, for times when I’m not actually in Minneapolis.

It’s absolutely feasible for me to ride my bike wherever I want, and set up a stealth camping spot for the evening.  I’m not advocating for camping illegally, but simply finding interesting spots to rest for the evening that will keep me within the good graces of Johnny Law. 

It is decided.  I’m going to use my bike to camp a shit load this summer.  How much is that?  I’m not sure yet.  I’ll include a schedule in my next Blog entry.

Tonight I went to task updating my stock 20” Surly Troll to serve as my bike camping platform. 


Here she is…ready for a reboot.

The first things I wanted to change were the tires.  I had some older Tioga Psycho Genius tires in 26 x 2.3 sitting in my garage.  They’ll do, until they don’t.  Then I’ll try something else.


I also have this Titec H-bar, designed by Jeff Jones.  It’s a great multi-position bar that’s comfortable.  It’s a known quantity and perfect for my Troll in an off-road touring/camping configuration.

Here we have a wonderful pair of Moto-lite Rim Brakes, courtesy of Paul Components in anodized blue with silver trim.  I’ve been saving these brakes for something special and I’m happy to report that it was worth the wait.  Setting up the Moto-lite Brakes was therapeutic. Aside from two very minor complaints, my initial impression is, that these brakes are CNC’d works of functional art.  There are lots of good reasons to use rims brakes on a mountain bike, even in this disc-brake-crazy world.  Personally, using rim brakes affords me the opportunity to get in touch with my inner-bike-grouch.  Behold.


I finished off the evening by installing a shiny-silver Thomson seat post topped with a San Marco Concor Saddle.  I like the contrast the silver brings to the table, and friends, I don't really care if you agree!

I also scored a Surly Framebag made by Revelate Designs to fit my Troll.  Pic of the mounted bag to follow...


I’ll button up my rig this weekend and do a few things like remove the discs from each hub, run shifter cable and housing, and maybe swap my crank from the stock triple to a double or even 1x.  We’ll see.  Below are a few fun photos of the progress.


Do anyone of you have bike packing or stealth-bike-camping experience that will help me along the way?  Please let me know!

Stay Squirrely,

Surly Greg

Greg@Surlybikes.com

Scotland, Fatbikes, Beer, Whiskey and the Skip and Gern Show

$
0
0

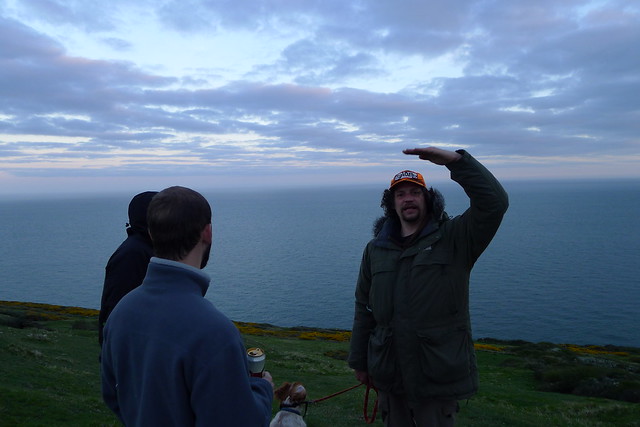
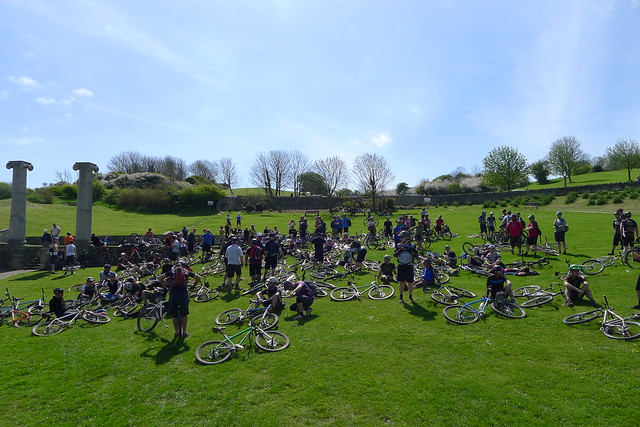
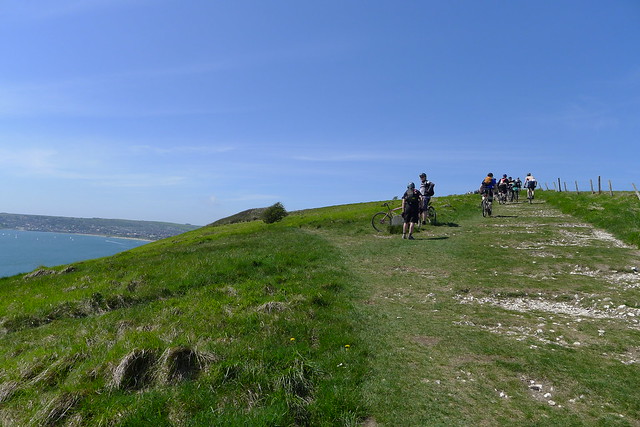
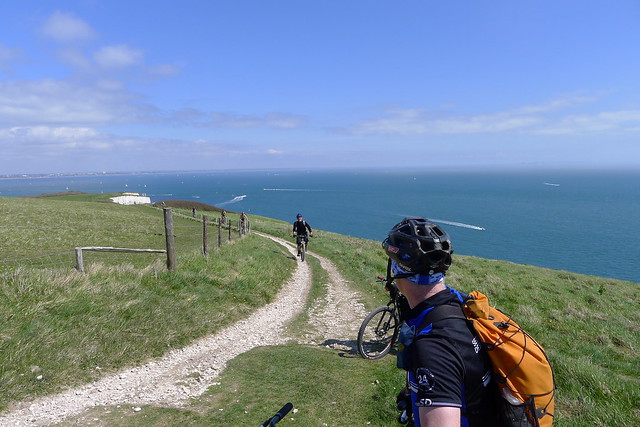
Sov and I are in a massive van, being piloted by a Brit named Pat on our way to a hotel outside of London near Heathrow Airport.  We’re driving away from Single Speed UK, in Swanage, which is on the Dorsett coast of the United Kingdom.  We’ve been here 12 days and it’s been pretty awesome from start to finish.  Last week we landed in Edinburgh (neither of us having slept at all on the trip over) on Saturday morning around 8:30, put our bikes together and road fatbikes with about 40 people on the rocky eastern beaches of Scotland.  The event was called Forth Fat, and this year it was arranged by a guy named Bruce (also known as the Coast Kid) and it was a blast. 

Here is where you can find Coast Kid's account of the weekend. He was either way less drunk than I was to remember so much, or maybe he just pulls it off better.

http://coastkid.blogspot.co.uk/2013/04/forth-fat-fatbike-gathering-27th28th.html

Here is a shot of my pug all loaded up with my camping shit.  I used the sleeping bag as packing material to save a bit of room.

When I first heard about going on a two-day beach ride up in Scotland on fatbikes, I was excited, but also a bit pensive.  I’ve done some beach riding before and while it’s fun, it’s not necessarily how I would spend two days.  Slowly pedaling across the sand over and over moving slowly and watching the ocean tick by. That’s not really how it was at all though.  There was a fair amount of sand, but there were an impressive amount of rocks.  The idea was that we were riding while the tide was low, so we could really traverse the tidal rocks and take in some truly breath taking sights.  The first big stop was at this spot, with corroded submarines left on the coast from World War II. (This was actually where we met them for the first time)  From there it was rocks and some pretty impressive single track.  I road my Pugsely set up 1x10 and it was pretty perfect.

The 40 of us were a pretty impressive site to see.  Riding along all on fatbikes (except for a couple of Krampus, and one brave soul on a Karate Monkey).  I certainly have never ridden with so many other fatbikes before, and I imagine from the outside we looked a bit like a freakish weirdoes pedaling bikes that look like they weigh a hundred pounds each.  On the inside of course we all thought we looked like a 50’s bike gang or possibly the cast of Happy Days (that would make Bruce the Fonz, me Potsey and Sov Ralph).

We road in the day and in the evening we drank lots of great local beer.  We also had our fair share of whiskey, as the locals wanted to show off all their flavors. 

The people were fantastic: friendly, fun and very patient of Sov and I and our funny “accents”.  They were truly a remarkable bunch.  Many from the area, but some who’d traveled quite a long way to get there and ride with other fat converts. 

Much like in the States, the people there who ride those bikes have really taken to it, and many of them confessed that it’s the only bike they ride any more. They ride it in every season, and on every terrain, just like many of us do back home.

There were lots of other brands of fatbikes around, of course the Surly’s made a good showing, but it’s nice to see other brands finally accepting it as a “legitimate” ride instead of a passing fad.


All in all it was some of the best riding I’ve done and the weekend was a roaring success. 

We spent the next week zig-zaging across the country visiting dealers and riding a tiny bit.  The next weekend we spent with Charlie the Bikemonger in Swanage at SSUK.  I won’t say much about that, cuz you’ll hear all about it from Sov.  I will say that I road the Pug with a set of offset Rabbit Holes, and we’ve even started carrying orange rim-strips so I could keep my Halloween theme going on the bike. It handled awesome on the trails. It's not like the Krampus, it's like something else all together.  Here are some pictures of it with the Rabbit Holes (with some clearancey shots for you nerds out there)

Notice those snappy orange rim strips. They are my favorite so far, but that's not surprising from a guy with a pumpkin bike. Here is that clearance shot I promised.

And another.

I road the Pug with Marge Lites and Knard 26x3.8s on the rocks and Sov road the beach on his Krampus and it worked pretty well for a trail bike.  He was much happier than the guy with the Karate Monkey, but couldn't traverse the really loose stuff as well as the fellas on Moonlanders. 


If you ever get a chance to ride the beaches in Scotland on a fatbike, I couldn’t recommend it enough.  But there’s no time like the present, so go ride.


Fruita Fat Tire Festival 2013

$
0
0

Fruita, dinosaurs and drive through liquor stores.


For years now I’ve wanted to go to Fruita for the Fat Tire Festival but something always got in the way. Things like work, money, life; I’m sure you know what I’m talking about. Having ridden exclusively in the Midwest I would drool over the photographs of the trails in Fruita, Grand Juncture, and Moab, day dreaming of what it would be like to ride there. I cut my teeth mountain biking in the early 90’s just outside of Detroit at places like Highland State Recreation Area, Kensington, Holly, and other places that probably no longer exist. Twenty years later I’m still riding the local trails, only now I’m in Minneapolis. I hate to say it but I’m most likely one of the least experienced mountain bikers that works for Surly so I was somewhat intimidated about what I was getting myself into when I found out that I was going to get to go to Fruita to ride on the company’s dime. To top it all off, two days before we flew out to Denver, I got knocked on my ass by the worse cold I’ve had in years. Panic sets in and all I could think about is how sick I was. I could barely breath, I felt like shit, and it was too late to turn back now. The night before our flight departs, April 22nd, Minneapolis gets 8 inches of snow. Yep, it was time to get the fuck out of Dodge.


I had asked our newest engineer, Andy, if he’d like to come along with me. There was no hesitation what-so-ever when he replied with a loud “Hell yes I’ll go to Fruita with you!” So we started to plan our trip. The extent of our planning was buying plane tickets and renting a van. That was it. Andy is a pretty laid back guy and he enjoys the simpler things in life like sleeping in the back of a van, wearing the same socks until they’re fused to your skin, and playing things by ear. Me, well, I like having a plan, taking a shower every now and then, and knowing what the hell is going on. Don’t get me wrong now, I love camping, backpacking and “roughing it” out in mother nature, but if I’m going to be riding out in the desert all day long a shower in the evening sure would be swell. But, for a nice change of pace I decided I’d go along with Andy’s plan and not make any plans at all. We packed up our bikes and gear and sent it all to Salvagetti in Denver so we didn’t have to fly with them.


Andy, getting ready to ride Rustler's Loop


Phillip and the crew from Salvagetti could not have been more accommodating. Phillip even offered to put us up for a couple of nights and we gladly accepted. We spent one night in Denver, got our bikes put together and did some drinking, some eating, and then more drinking. The following morning it was off to Fruita. 

We rolled into Fruita at around 5 PM Wednesday and started to drive out to the campground at 18 mile road. About half way there I thought we should at least call a couple of motels around Fruita to see if they had any open rooms. As luck would have it there was one place that could put us up through the weekend so we decided to go check it out. A few minutes later we were pulling into the parking lot at the H Motel and Andy is having serious reservations. He thought that motel looked pretty shady and he really did not want to have anything to do with it. Then I noticed that there was a Surly sticker on the door to the motel office and I said “See man, its destiny. We have to stay here now.” After a little more persuasion from me we were checking into room 13. After unloading the van and thoroughly checking the room out Andy was a happy man again, we had nice big beds to sleep in and a great new shower to wash away the grime from riding all day. To top it all off, we had great neighbors and we were only 3 blocks from downtown Fruita.


The H Motel.


Rustler's Loop heading back to the trail head.


Somewhere along Horsethief Trail.


On Rustler's Loop, wind in my beard.


I brought my prototype Krampus that was fully rigid with a 1x10 drivetrain (32t chainring, 11/36 cassette) and Andy brought his Krampus that had a Fox fork on it. After riding for 3 full days I decided a suspension fork would have been nice, but not 100% necessary. We rode the trails at Kokopelli, 18 mile road, and the Lunch Loops in Grand Juncture. My favorite trails were Kessel Run, Rustlers Loop, Horsethief and Mary’s. The Krampus absolutely screamed down Kessel and I spent most of my time on that trail reining my Krampus in. Rustler’s Loop was a lot more fun than I thought it was going to be, there was very little climbing and the faster I rode it the more fun it got.  When I did have to slow down, the Krampus would be back up to speed in three or four pedal strokes. The 3” Knard 27 tpi tires on our Rabbit Hole rims performed fantastically for me. They hooked up great on all the trails I rode only washing out on me once, and that was defiantly user error! I got zero flats which was pretty surprising because I had been warned of the goat head “situation” when riding in that area. We rode every day, pretty much all day. I’m not going to lie, I was hurting at the end of the day but it was well deserved and it did feel good. I never really did get my lungs to work like I felt they should but that was more due to the cold I couldn’t shake and the altitude than anything else. Not to mention, this was really my first bit of serious riding since last fall and I was not in prime shape.


Hot Tomato, best pizza I've had in a long time. We ended up eating there four nights in a row.

Great staff and great owners really make this place special.


All of the trails I rode were well thought out and planned beautifully. The views were amazing, unlike anything I’ve ever seen before on a bike. At times I was challenged as I rode and I’m not ashamed to admit I walked my bike through sections that were beyond me. I crashed once, late in the day on Friday and walked away with only some bruised ribs and a bruised ego. All in all I’d have to say this was the best bike trip I’d ever been on and come hell or high water- I’ll be there again next year for the Fruita Fat Tire Festival.


When riding in the desert, don't forget your sunblock.


More to follow, the people we met, some of the things we saw, and the places we went.


BoB
 

Krampus Complete Hiccups

$
0
0

So our newest bike, the Krampus, started shipping a few weeks ago. We just couldn’t be happier or more proud of our new baby.  It has, however, come to light that there are a few hiccups with the complete bikes - it’s causing some questions and headaches.

The first thing is that as delivered, the wheel was pulled back in the dropouts. Nope, we want that all the way forward for good handling and to shift right. Once moved to the full-forward position, the chain is too long – way too long!  The bike I got had a chain with 118 pins in it.  That’s long enough that the mid cage derailleur was back against its stops and the chain was sagging onto the chainstay.  No good.  We want to spec a chain that’s short enough to work well, but long enough for people to pull their wheel back a bit if they want to.  I pulled out 4 links (or 8 pins), so the correct length chain for a Krampus with the stock gearing (!!!) is 110 pins.

Pulling the wheel back in the dropouts works OK, but brings up another problem.  Shimano Shadow-Plus derailleurs (like the SLX spec’d on the Krampus completes) are awesome, but are sensitive to axle placement.  What some people have found is that if you pull your wheel back too far in the dropout, your chain hits the knuckle of the derailleur and makes shifting into the smaller cogs, er… difficult. 

This problem is compounded by the fact that the bikes were mistakenly shipped with V.2 Monkey Nuts.  Monkey Nuts hold the wheel back 14mm in the dropout and ARE NOT COMPATIBLE WITH SHIMANO SHADOW PLUS DERAILLEURS.  (I’ve found you can pull your wheel back up to 8mm in the dropout and everything is still gravy, so if you want to shorten those monkey nuts up to 8mm or less somehow, that will work.)

Next up is the chain guide.  Is yours rubbing on the tire? It wasn’t on the bike I built, but we’ve heard complaints of that happening.  If you’re seeing that issue, I would check to see if three (3) spacers are in place between the guide and mount.  If they are there and the guide is too close for your comfort, the guide can be clocked forward to clear the tire.  This will require removing the crankset and loosening up the driveside BB cup – sorry, but nothing worthwhile is easy.

*This discussion demands an agreement on the definition of tire rub.  My definition of tire rub is the tire rubbing something.  Sprues just don’t count.  If you think that the mold sprues rubbing something is the same as the tire rubbing something, I can’t help you.  Sprues go away with riding – if you want them gone, just lean your bike over and gas it.  They will be gone faster than Coors at a Sunday barbeque!

Lastly, the B-tension adjustment was WAY out on the bike I built.  Way out. B-Tension is that oddball screw setting on the der. You know, the one that isn’t a limit screw.

In summary, or for you who wisely skipped the above outpouring – if you are building a Krampus, here’s the deal:


  1. V.2 MONKEY NUTS ARE NOT COMPATIBLE WITH SHADOW PLUS DERAILLEURS!
  2. Throw the Monkey Nuts that are included with the bike in your parts bin.
  3. Slide the wheel fully forward.
  4. Shorten the chain to 110 pins long (55 links).
  5. Adjust your B-tension screw to spec.
  6. If your tire is rubbing your chain guide, loosen up the BB, shift into the smallest cog, and clock the guide forward until its back clears the tire, but still clears the chain.  You’ll know what I’m talking about when you’re there.

We love all of you and are sorry about this, but shit happens - let's try to get over all of this and down with proper setup.

XOXO

Surly Intergalactic

Haulin’ Some History

$
0
0

Recently, I gave a fatbike-oriented presentation.  I figured some props would be helpful, so I dug around in the garage and came up with some appropriate pieces.  I had to get the hardware to the office, so I attached Bill to the Big Dummy and Junk Strap'd everything in place. 

My Cargo...

*  Pugsley #1...the first prototype. This was our Interbike show bike, then my geared test rig, and, eventually, my single-speed.  I rode it with 26 x 3.0 Nokian Gazzaloddi tires before Endomorphs were available.  That's how it was equipped when we introduced it at Interbike in 2004.  I still ride it with cantilever brakes...no rotors to get bent in a derby. 

*  My latest Moonlander...2nd-round proto.  This is my worst-case scenerio bike.  It's my out-of-bounds camper/commuter/playbike. 

* The Goiter.  I built this rig to test the viability of using fat wheels on a unicycle.  I commuted on it, ran errands on it, and went uni-camping on it. 

* The Conundrum.  Our discontinued fat-tired unicycle offering. 

Things I Learned at Single Speed UK

$
0
0

"Don't be a dick." Charlie the Bikemonger knows a few things about brevity. He's also fluent in sinlge speed races, or "reliability trials," or "liability trials." Whichever.

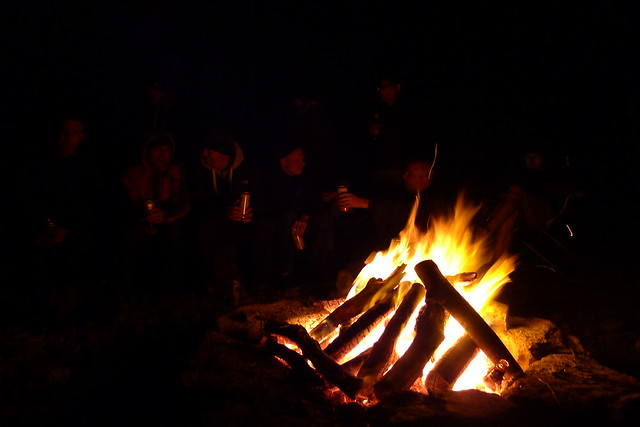
Maybe this doesn't make sense to folks who weren't there, but that's ok. It doesn't need to. All you need to know is that Dorset in the UK is a very hard place to get to, but very much worth the effort. Gut-twisting climbs up massive seaside mounds always paid off with stunning views and rebel yell descents. Cold clammy camping was tempered by the friendliest bonfire in the English (or some variant thereof) speaking world. And single speeding is still alive despite the efforts of all of us.

This is what I remember:

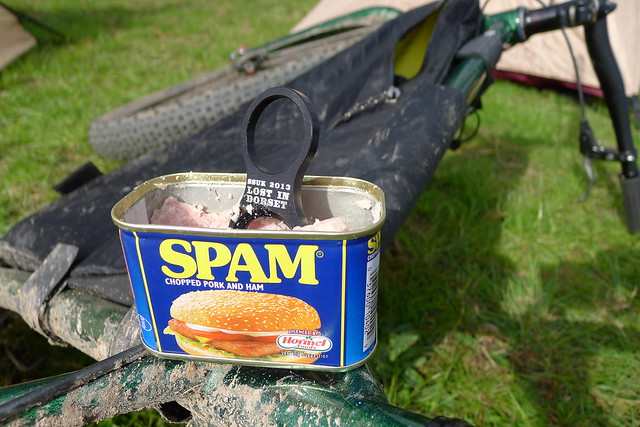
Camping provisions are best eaten with the Official SSUK GPS Device.


This is almost never a bad thing.


Something in England is "about this tall."


The "start" of the "race" was pretty "tense."


Going up is hard.


Looking back down made up for the hard.


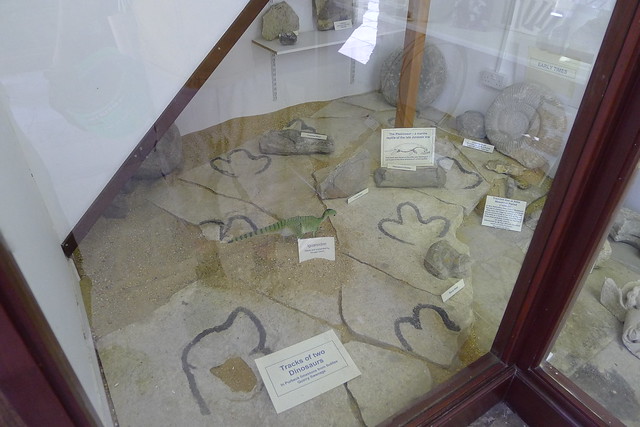
A few racing firsts were achieved - stopping at a museum to see dinosaur footprints for one.


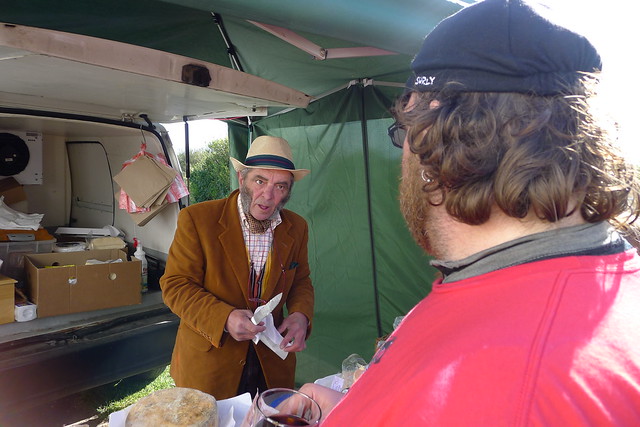
A local selling fancy cheeses at the finish line was another.


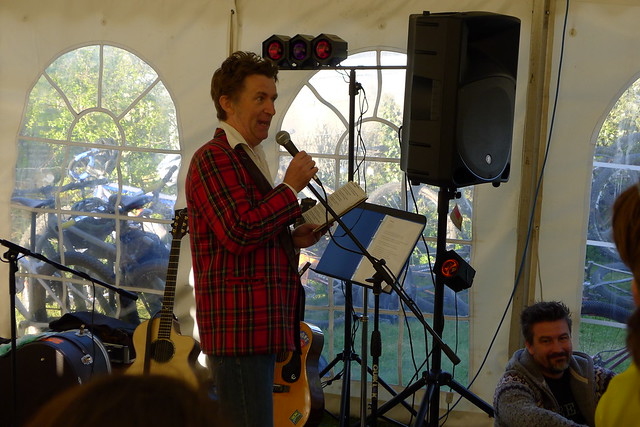
And I now feel that every race should have a poet scheduled at some point in the day.


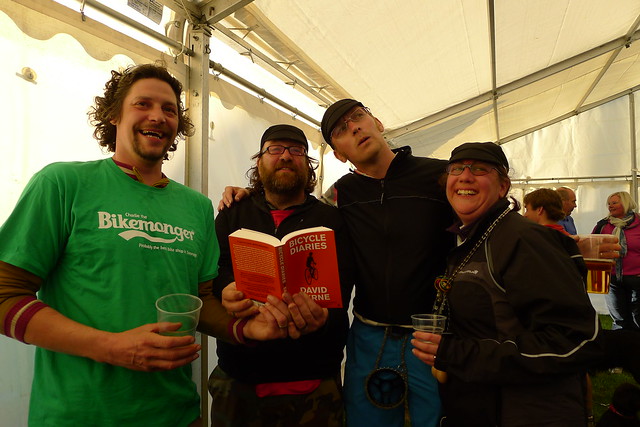
The two on the right won (though we're not entirely certain how that was tabulated). The two on the left were ineligible - one for organizing, the other for being far too American.


So, if you're ever in Swanage, or possibly if you're in Birmingham next year, ride a bike with one gear and you'll probably learn something vital. Either that, or you won't. Still... do.


-Skip

Taiwan Trip

$
0
0

Adam and I are currently in transit on our way home from Taiwan.  We were there for two weeks, enjoying all that is a product development trip for Surly.  We kicked off some brand new projects and greased the wheels on some existing ones.

Taiwan is pretty rad.  Good people, bizzare food, and a country filled with manufacturers that make bike parts for the world.

Here are some random pictures I snapped during the trip.  Enjoy...


Squat Toilet

Squat toilets... Pretty tough to waist time on your cell phone while using on of these.


Checking in on Krampus production.  I do love the look of a raw welded frame.


A whole rack of LHT Disc non-drive side triangles waiting to be welded into frames.


At nearly every supplier there is a quality assortment of candy, coffee, tea, and water.  Seeing as I don't read Chinese, eating candy from the bowl is a little like Russian roulette.


I think an unpolished stainless seat collar would be bad ass.  What do you think?  Also, some top secret 2014 stuff on the table in the background.  You are going to like it.


This is our good friend Willy hanging out at the tire supplier.  Willy is basically Surly's Taiwan engineer.  He keeps tabs on our manufacturers and makes sure everything is going smoothly for us.


Some OD crank arm forgings.  It is wierd to think that one day the exact forgings in this picture will be machined, painted, boxed, shipped, shelved, purchased, installed, and then ridden by a Surly fan.  This could be a picture of the cranks you buy in the future.


OD crank, check.


I think I saw Jeremy Wade catch this fish on River Monsters.


Chicken feet taste exactly how you would guess, skin and bones.  Nummy.


Raw Krampus fork looking good.


That's a whole lot of Krampus forks.


During our trip we had the chance to do some work on a local Taiwan mountain bike trail.  Crazy enough, these massive spiders (Golden Orb spiders I think) were everywhere.  They had huge webs strung out across the trail waiting for bikers to get tangled up in them.  Apparently their poison will only cause some local irritation if bitten, but damn, I was not a fan.  Fortunately, we walked the whole trail and cleared out all the webs before riding.


We also found this MASSIVE earth worm out on the trail.  When it stretched out it was easily over two feet long.  More snake than worm in my opinion.


Whole slew of LHT forks waiting for some paint.


Leeche's advice for driving in Taiwan.... "The rule is, there is no rule."


An Unlikely Swamp Monster

$
0
0

Having been “with” Surly for quite a long time now, I have been honored to meet a lot of fine people (I have also have been made to suffer many more people with whom I did not “see eye-to-eye,” but that's a long series of other stories). Once many years ago I answered an email from Steamroller rider Elan Viss. Elan had written to Surly HQ to let us know how much he loved his Steamroller and has from time to time written back to update us on his life and his bike. The other day I received an email from him, the first one in quite a while, and I thought I’d share it here to illustrate first that we make tough bikes that work well for all kinds of things and that last a long time even when you don't pamper them, and second to illustrate that core Surly customers do not write in very often because they are off living fulfilling lives instead of sitting in front of a glowing screen eating Cheez-its and waiting for the next chance to “like” something on Facebook.

       The photo doesn’t begin to explain how cold this morning was. In the Central Valley of California, there is a sort of wet-cold that just hurts to be in. It was only 33 degrees, foggy, and everything that was supposed to keep me warm was soaked. My buddies and I had to take bikes back into the hunting refuge because the roads are blocked off to motor vehicles. That left us very few options. The Surly is set up as a fixed gear rig with no brakes. I robbed part of my parent’s shower curtain rod to make the handlebar. The brushed stainless looks good, but it is primitive. I have to say that the bike handles like it was designed to cross small rivers loaded with shotguns and duck decoys; the folks at Surly very well may have accounted for this. Either way, it performed much in the likeness of its namesake. This article, I reckon, is an ode to versatility and fundamental quality. The no frills approach to bike making seems to be a thing of the past, and otherwise bygone so-to-speak. Not with Surly though. The 4130 carries my hulking frame just fine. Even though I’m about as nimble as an elephant, the bike almost makes me look like a true athlete. Whether I’m riding to the store, riding through a creek, riding for fitness, or just riding because I feel like riding, the Steamroller is my steed, and a good one at that. Thanks to Anders Jerner and Sam Sawyer, my photographer and hunting guide, respectively. Keep it real, and get Surly. 
-Elan

Haulin’ Some History

$
0
0

Recently, I gave a fatbike-oriented presentation.  I figured some props would be helpful, so I dug around in the garage and came up with some appropriate pieces.  I had to get the hardware to the office, so I attached Bill to the Big Dummy and Junk Strap'd everything in place. 

My Cargo...

*  Pugsley #1...the first prototype. This was our Interbike show bike, then my geared test rig, and, eventually, my single-speed.  I rode it with 26 x 3.0 Nokian Gazzaloddi tires before Endomorphs were available.  That's how it was equipped when we introduced it at Interbike in 2004.  I still ride it with cantilever brakes...no rotors to get bent in a derby. 

*  My latest Moonlander...2nd-round proto.  This is my worst-case scenerio bike.  It's my out-of-bounds camper/commuter/playbike. 

* The Goiter.  I built this rig to test the viability of using fat wheels on a unicycle.  I commuted on it, ran errands on it, and went uni-camping on it. 

* The Conundrum.  Our discontinued fat-tired unicycle offering. 


Single Speed Cross Check

$
0
0

So as some of you may know, we here at Surly make a little bike called the Cross Check.  This was the first bike we ever offered as a complete bike, that was way back in the year 2000 when many of you were wearing diapers (grow’d up style diapers). (As it happens I am wearing them right now)  It was offered geared, like most people ride a cross bike and people liked it.  People kept buying the frame and built it up however they liked and other people bought the complete.  Sometimes those two people would meet and stare at each others bikes, and sometimes they would only ride by and grunt.  Some people who bought the complete started to mess with their bike, once they realized they could run it so many ways.  They saw 1xwhatevers, single speeds, fixies, cruiser types, townies, touring bikes and many others that I just don’t feel like listing here.

At Surly, many folks here had there’s built up as a single speed with flat bars and v-brakes.  Here is a picture of Phil’s bike, just like that. 

Lots of people ran their bikes like that, and lots of people said to us that we should offer a complete version of the bike that was like that.

We thought to ourselves, maybe someday, and now that day is here.  Well really it was here a while ago, I’m just telling you about it now, and many of you probably already know about it, but at any rate we make this thing and sell it too.

Here’s some more pictures of some of our crews single speed Cross Checks, enjoy!

Now get off your computing device and ride some, it’s nice outside!!


A Long Strange Trip

$
0
0

A few years ago we came up with the idea to do a S&S coupled frame set as an option for those of us who travel a fair amount and want to bring our bicycles along with us.  Having a bike to ride in cities traveled to is a refreshing alternative to cabs, buses and cars, and allows you to see and experience new places in more intimate fashion.  While there was agreement within our group an the idea of doing this type of frame, there wasn’t consensus at first on what the frame should be.  Some thought it should be a mountain bike, others thought a road bike, and still others a touring bike.   In the end we decided that our Cross Check would be a good fit because of its versatility and solid ride characteristics, and thus was born the Travelers Check. 

I received my frame as one of the test samples in my choice of color, which I thought would be a turquoise green but arrived in what one might describe as mint toothpaste green.  Some loved the color and many hated it, but I didn’t care because I just wanted to ride it.  I did indeed ride it:  all over the world in fact.  And after about 10 trips with it the paint was battered and beaten to the point where I started dreaming of giving it a fresh coat of paint.  This dream went on for a couple of years, long after the parts from it had been stripped off and installed on my new Trucker Deluxe sample that needed testing.  Meanwhile, my Travelers Check hung neglected in my garage as I continued to think about what to do with it. 

I finally realized its calling as I reckoned back to 1995 when Gary Fisher released their Grateful Dead special edition Hoo Koo E Koo bike, which had a Dead inspired paint scheme and graphics designed by Prairie Prince himself.  I had no intention of copying what they did with my bike, but I did want something fairly trippy and mellow to mimic the feeling I get when I ride my Travelers Check in cool exotic places.    

I began with choosing a paint color that would fit my version of this theme.  My favorite color is navy blue, so I went looking for something in this range, but also with some metal flake.  I found what I was looking for on a powder coater’s website, and then I asked fellow coworker Anthony Peterson if he could replicate it for me.  He said he was up to the challenge, so I handed him my frame, fork and two Salsa steel stems to paint for me.  Within three weeks the paint was done, but during that time I started thinking about how to make the decals special, so I asked Andy Wood to help me figure something out when he wasn’t working on making videos about bikes and chips.  We bought some silver cutting sheet and he designed what you see on the bike.  This took a lot longer than you might think, and I do not recommend doing this yourself unless you enjoy tedious and labor-intensive work, but the end result was pretty kick ass if I do say so myself.

I also wanted something special for the head badge, so I called up Jen Green and asked her to make the Steal Your Face graphic in relief that you see here.  She had already done one of these for another customer so it wasn’t too hard for her to do.

I also wanted polished silver parts to compliment the dark blue sparkle paint job, so I called up Paul Components and ordered me a barrage of shiny bits.  The hubs are laced to HED Belgium C2 rims, which are the nicest pavement rims I have ever used.  My good friend Shinya Tanaka from Circles Bike Shop in Nagoya hooked me up with the Nitto Sim Works chromed cromoly stem.  The handlebars are Nitto and the bar tape is Brooks leather.  I also received a chromed steel rack from Nitto for this but it was too small for my frame size and was impossible to get level, so I swapped it for a Surly Rack.  The tires are Resist Nomad in 700x45, which roll fast and provide comfort while not costing much.   

The pedals were a very special addition from my friend Ali at Moto Bicycles in Berlin, Germany.  He makes the flats of the pedals from skateboard decks and uses a sandwich of two high impact plastic plates to reinforce the wood for durability.  They are low profile and allow you to wear all kinds of casual footwear comfortably.  The non-skid surfaces are replaceable and do the job quite well in wet or dry conditions.  These pedals are not cheap, but they are very unique so if you would like a pair of your own you should contact Ali through his website.  These pedals are currently not available in most countries outside of Germany.

 This project took a lot longer than expected to complete, but it was a great way to spend the long cold winter here in Minnesota.  Now it's time to ride.


Der Baron Rohloff Von Moonlander

$
0
0

I’ve always been intrigued by the Rohloff hub.  It’s a pretty ridiculous piece of equipment that seems to get people worked up for one reason or another and I like that about it.  Some people say it’s the end all be all of durability in everlasting bicycle drive train technology; others say the only thing greater than it’s stupidity is its opulence.  Everyone I’ve talked to about Rohloff hubs will invariably finish up whatever diatribe the mention of that name evokes by saying something along the lines of “I mean, I’ve never even touched one because they’re so goddamn expensive but….” Gee, thanks for your opinion, guy!  I decided I was going to put this whole issue to rest and just build one into a bike and write a spew about it so there wouldn’t be any mystery to it anymore.  Also, stop asking.

I remember the first time I ever got to see one was at B.Rose’s shop when this dude from Spain came in needing an oil change.  B.Rose didn’t get that 'oh shit' look that most bike mechanics I’ve seen get at the mere mention of the name, but he sure as shit didn’t have any oil laying around either so the guy  had to leave his bike and come back.  I got to talking with the guy about his trip and where he’d been and how he liked the hub and this guy really changed my mind about the merits of the hub.  First of all, when you’re riding your bike around the earth self-supported you can’t really be a dick to people.  Second of all, this guy was the real deal.  He wasn’t out there to raise awareness for anything whatsoever, he didn’t bother to call us and ask us for a free LHT frame, he was just a dude who sold all of his shit except for his bike and camping stuff and left it all behind because he likes riding his bike and he likes seeing new places.  Pretty rad....

If you ask the Rohloff website if the hub will fit in our frames, it’ll tell you no, it doesn’t work with rear-facing horizontal dropouts like the ones we use.  This is not true.  Thanks a f*ckin' bunch, Rohloff website.  The Rohloff hub will fit and work in our frames, but they will need some coaxing.  There is more than one way to make it work but for the purposes of this spew, I’m going to be explaining the one and only, Surly Approved way of making this happen.  If you decide to try some other way, God speed, Killer; you’re on your own and I don’t care what happens to you.

Frankly, I don’t think the problem is that these things are actually that complicated.  The problem is that for one hub you can get something like, and I’m just guessing here, 58 different combinations of axle-plate/speedbone/axle-type/gear-mech/whatever-the-hell-else-bolts-to-the-outside-of-this-thing, and that just confuses people.  Well, I’m here to tell you all you need is the OEM2 axle plate and a speedbone.  It’s that simple.  Hell, if you get an Ogre or Troll, which is what you should be getting if you want to run one of these things, you can even save some bank because you don’t need the Speedbone.   We make the Ogre and the Troll such that the axle plate will bolt right to the frame.  Don’t say we never did anything for you.

Down to business.  What was that I told you to get?  Oh yeah, the OEM2 Axle Plate, and the Rohloff Speedbone:

If you're unfamiliar with the way these two things interface, the basic idea with any internal hub is that the axle is part of the gear unit and thus carries load and will want to rotate if not fixed somehow to the frame and this is what the various axle plates (or no turn washers on other hubs) and their corresponding fixing methods accomplish.  They provide the fixing point for the axle and forward movement.  The next photo shows how these two pieces interface.  The Speedbone provides an anchor point and the axle plate is merely an extension for the axle to interface with the anchor on the frame.  It's a pretty simple concept, see!

Now to put the shit together....  I happened upon a hub that had the standard OEM axle plate that is used for frames equipped with the Rohloff specific dropouts so I had to change the axle plate.  Not a particularly big deal, just a handful of torx bolts that need to be loosened, swap the plate, reinstall the bolts and you're ready for action.  If you are going to put this setup on your Moonlander like I did, it might behoove you to note the angle of the Axle Plate and the External Gear Mech Arm.  The angle at which you install the Axle Plate will decide how your shift cables are routed and in order to make it look as pretty as you, the reader, you'll want to have the Gear Mech Arm following the line of the seatstay so the cables can follow the seatstay and enter the Gear Mech. from the top.  This won't hold true for every frame we make, but I think this is a good setup for the Moonlander.

After I got the axle plate situation taken care of I moved on to the Speedbone.  The thing comes with extra long bolts that will replace your caliper adapter mounting bolts and it all just slaps right together.  If you can install a rear brake caliper, you can install a rear brake caliper and a speedbone.  If you are so inclined, now would be a good time to go make yourself a meatball sub.  You've earned it.

Once you have both of these parts installed it's really just a matter of putting the wheel in the bike and getting your chain tensioned, which is made siginificantly easier by a Surly Tuggnut.  After that it's just a matter of tightening down your brake caliper and battening all the hatches.  Once it's all together, this is how it looks.  Not much room in there for anything other than the concept of German Engineering....

And the head on shot of the whole shootin' match:

My theory on why Rohloff says their hub won't work in our frames is because the way the Speedbone and OEM2 plate interface isn't particularly easy to manage on rear facing dropouts like ours and if you get a flat tire getting the wheel off is a bit of a trick but in my mind nowhere close to a deal breaker.  You have to loosen the caliper adapter fixing bolts because the Speedbone sort of traps the wheel in the dropout, but if you set the OEM2 Axle Plate up the way I did, it will keep things out of the way enough that it's really not that difficult of an operation to get the wheel off.  You simply loosen the caliper fixing bolts, push the wheel forward in the dropout and rotate the axle plate down so it clears the horizontal anchor point on the Speedbone.  If you're looking for instructions on Rohloff setup and installation, you've come to the wrong place.  Rohloff has already written those and I'm an impatient and punitive teacher, so head elsewhere if you have questions about that, but this is how you put one of these contraptions in our frames.  Wasn't that easy? Now get out there and try to break the damn thing!


Get out of the Dirt

$
0
0

We have a Surly retreat coming up where we are packing up the bikes like donkeys and riding southwest to camp out, drink tea and wax-poetic about bicycles for a few days. I was onboard when the idea was tossed out but also intimidated.

I’ve always had a negative view of road bikes from my time working in shops. The skinny wheels and gnarled bars make me feel uncomfortable and confined. I like to ride where I want to ride. I do not want to be limited by a skinny bald wheel. It’s not my thing. Nor do I want to spend half an hour squeezing into skintight kits and adjusting my aerodynamic bits just so I can get on my bike. This was the idea I had of road riders. Skinny tires, skin tight crayola puke clothing and lots of high tech crap were required to successfully ride on a road for any number of miles.

The thought of riding 35+ miles loaded down with a bunch of avid riders who do this type of riding on a whim, made me nervous. So I decided to make an effort to get as much road time as possible before our trip. Rain or shine or severe winds as it were. I shall ride.

Riding to and from work regularly was helping but I was still able to stay within neighborhoods and take paths off of the street to make it into work. The big game changer was a ride into Lowertown St Paul for drinks and eats. It was a 20 mile loop and included climbs and city street riding. I had never ridden more than 16 miles in a day and never in the dark.

I prefer to ride in street clothes and shoes. So I wasn’t too geared up when I set out for my ride. Here is what I had:

  • Jeans
  • Cotton long sleeve shirt
  • Shoes
  • Cars R Coffins Sox (RIP little coffee shop)
  • Knog Frog Strobe white LED
  • Nathan LED Safety Strobe red light
  • Lock (last minute addition I almost forgot and that would have sucked)
  • Surly Long Sleeve Wool Jersey
  • Old canvas messenger bag
  • Shimano windbreaker 2 sizes too large that I found in my basement (I had left my jacket back in Surly land and winds were kicking at 26 mph+)
  • Old Fox helmet
  • Trusty Cross-Check

All stuff I had lying around mostly. I had to buy the lights because my last set had disappeared probably 7 or 8 years ago.

I set out with a 26 mph headwind and pushed my way towards the city. I got lost, I went down steep hills, climbed steep hills, road through parking lots, on sidewalks, on bike paths, on roads, in bike lanes and on some dirt just cause.

I had a blast. I showed up and rewarded myself with fancy beverages and good eats.

I was pumped to ride home as the headwind would now be a tailwind and the 2 size too large windbreaker would now be a sail instead of a drag.

I rode much more road on the way home. My lights worked great. The weather was nice. The streets were actually quiet. I had to flip my bike for a quick chain fix but other than that my ride was smooth and uneventful.

I wasn’t even winded when I returned home. The next day I wasn’t even sore. I feel ridiculous now thinking I was worried about riding 20 miles of climbs and city streets. I honestly think you would too if you tried it. This was nothing epic. Nothing extraordinary. It was a hell of a good time.

My friends that do not ride heard about my little trip and were shocked to hear I did that. It amazed them. It would have amazed me too. It seems so far, until you do it. Then it’s not far enough.

Krampus Complete Hiccups

$
0
0

So our newest bike, the Krampus, started shipping a few weeks ago. We just couldn’t be happier or more proud of our new baby.  It has, however, come to light that there are a few hiccups with the complete bikes - it’s causing some questions and headaches.

The first thing is that as delivered, the wheel was pulled back in the dropouts. Nope, we want that all the way forward for good handling and to shift right. Once moved to the full-forward position, the chain is too long – way too long!  The bike I got had a chain with 118 pins in it.  That’s long enough that the mid cage derailleur was back against its stops and the chain was sagging onto the chainstay.  No good.  We want to spec a chain that’s short enough to work well, but long enough for people to pull their wheel back a bit if they want to.  I pulled out 4 links (or 8 pins), so the correct length chain for a Krampus with the stock gearing (!!!) is 110 pins.

Pulling the wheel back in the dropouts works OK, but brings up another problem.  Shimano Shadow-Plus derailleurs (like the SLX spec’d on the Krampus completes) are awesome, but are sensitive to axle placement.  What some people have found is that if you pull your wheel back too far in the dropout, your chain hits the knuckle of the derailleur and makes shifting into the smaller cogs, er… difficult. 

This problem is compounded by the fact that the bikes were mistakenly shipped with V.2 Monkey Nuts.  Monkey Nuts hold the wheel back 14mm in the dropout and ARE NOT COMPATIBLE WITH SHIMANO SHADOW PLUS DERAILLEURS.  (I’ve found you can pull your wheel back up to 8mm in the dropout and everything is still gravy, so if you want to shorten those monkey nuts up to 8mm or less somehow, that will work.)

Next up is the chain guide.  Is yours rubbing on the tire? It wasn’t on the bike I built, but we’ve heard complaints of that happening.  If you’re seeing that issue, I would check to see if three (3) spacers are in place between the guide and mount.  If they are there and the guide is too close for your comfort, the guide can be clocked forward to clear the tire.  This will require removing the crankset and loosening up the driveside BB cup – sorry, but nothing worthwhile is easy.

*This discussion demands an agreement on the definition of tire rub.  My definition of tire rub is the tire rubbing something.  Sprues just don’t count.  If you think that the mold sprues rubbing something is the same as the tire rubbing something, I can’t help you.  Sprues go away with riding – if you want them gone, just lean your bike over and gas it.  They will be gone faster than Coors at a Sunday barbeque!

Lastly, the B-tension adjustment was WAY out on the bike I built.  Way out. B-Tension is that oddball screw setting on the der. You know, the one that isn’t a limit screw.

In summary, or for you who wisely skipped the above outpouring – if you are building a Krampus, here’s the deal:


  1. V.2 MONKEY NUTS ARE NOT COMPATIBLE WITH SHADOW PLUS DERAILLEURS!
  2. Throw the Monkey Nuts that are included with the bike in your parts bin.
  3. Slide the wheel fully forward.
  4. Shorten the chain to 110 pins long (55 links).
  5. Adjust your B-tension screw to spec.
  6. If your tire is rubbing your chain guide, loosen up the BB, shift into the smallest cog, and clock the guide forward until its back clears the tire, but still clears the chain.  You’ll know what I’m talking about when you’re there.

We love all of you and are sorry about this, but shit happens - let's try to get over all of this and down with proper setup.

XOXO

Surly Intergalactic

Viewing all 750 articles
Browse latest View live